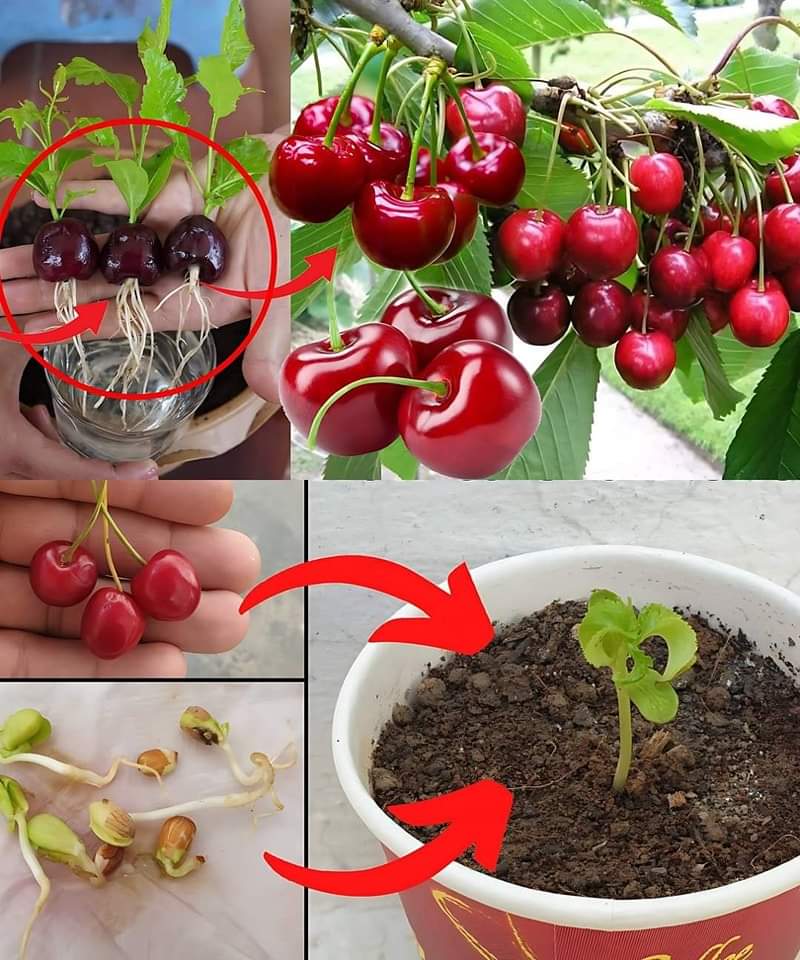
Simple way to sprout cherries!
Materials Needed:
Fresh cherry pits
Water
Bowl
Paper towel
Plastic bag
Planting pot
Potting soil
Step-by-Step Guide:
Step 1: Collect and Clean Cherry Pits
After eating fresh cherries, collect the pits and rinse them thoroughly to remove any fruit pulp.
Step 2: Cold Treatment (Stratification)
Soak the clean pits in water for 24 hours.
Dry them on a paper towel, then place them in a plastic bag with a moistened paper towel.
Seal the bag and refrigerate for about 10 weeks, ensuring the paper towel stays damp.
Step 3: Prepare for Planting
After stratification, remove the pits from the refrigerator.
Fill a planting pot with potting soil, leaving an inch from the top.
Lightly moisten the soil.
Step 4: Plant the Pits
Make small holes about an inch deep in the soil.
Place one pit in each hole with any sprouted roots facing downward.
Cover the pits with soil and gently press to remove air pockets.
Step 5: Provide Proper Care
Put the pot in a sunny spot, getting at least six hours of sunlight daily.
Keep the soil consistently moist but not waterlogged; water when the top inch of soil feels dry.
Maintain a warm environment around 70°F (21°C).
Step 6: Transplanting
Once seedlings are a few inches tall with multiple leaves, they’re ready for outdoor transplanting.
Choose a sunny area with well-draining soil, dig a hole, and carefully transplant the seedling.
Water thoroughly after planting.
Tips for Success:
Patience: Cherry pits can take weeks to months to sprout.
Monitor Moisture: Keep soil consistently damp but not soaked.
Protect Seedlings: Shield young plants from harsh weather and pests.